As you can see I made some progress since the last blog! In that episode I had just selected the designs I wanted to work with, including several new gemstones.
So I skipped as step before showing you this video. Basically that step showed the first soldering done. This one shows the soldered designs attached to their backing plus I have indicated a few of the components I am using for the ring shanks or pendants. If you read the first blog, you will have seen other gems that are not shown here. I had to dumb down my work so I could complete it in a reasonable time. As you may have guessed, I have a tendency to see a bigger picture than i have the time or energy for! I guess in the long run this is not a horrible habit. But I do have to ‘pin my ears back’ as my father used to call it. To take smaller bites and achieve more.
this also means there will have to be a follow-up blog to show the other gems. Rose Quartz, Druzy quartz, serpentine, Moonstone and Amethyst geodes will become finished designs too. Just not this week!
I am especially excited about this new gem discovery shown here. It’s called petrified palmwood root. I adore the black and caramel inclusions in this gem!
The next steps include final cleanup (some still need filing and shining). shaping and sizing the ring shanks, soldering the back of the silver and attaching to the ring shank and of course, final cleanup, polish and setting the stones.
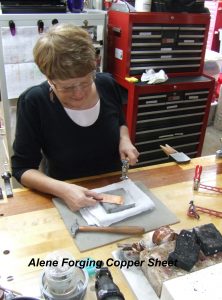
Lots of individual work goes into each design. and I love every minute of the process!
Follow me on my design journey by becoming a collector. My collectors receive first look at my newest designs plus Collector-only discounts and specials. It’s Free. And you Get 15% off your first order.
Here’s How
Shop Here for all my Designs.
Leave a Reply